
Fitting Group 2 Wheel arches
Click on the images to enlarge
After fitting the Revolution Wheel and Falken tyre package to my Mini I realised that the standard plastic arches were not wide enough to cover the 165 wide tyres. That meant that I would have to buy and fit wider arches.
After a quick look online at the options available I decided on some group 2 arches with black side trims for the outer arch and sills.
Is it easy to fit group 2 wheel arches to a Mini? The short answer is: it depends. The longer answer is that it depends on the model of Mini you have, I'll explain below.
Group 2 arches are usually fibreglass moulds painted black one side with indicator marks where you should cut or drill as required.
Let me explain a little further. If your Mini is de-seamed then you won't need to cut out the notches so that the arches will fit over the body seams. If it is not de-seamed then you will need to cut out the notches. Also, if your car previously had arches fitted there will be holes for the retaining screws to go. If not, you have to choose where you want the holes.
The following describes how I went about fitting Group 2 arches to my Mini.

First I removed the old plastic arches by drilling the heads off the old pot rivets. Once removed I inspected the wings, body, and sills for rust damage. I used a wire brush attachment on a power drill to remove flakes of rust and to smooth the bodywork. I also used an angle grinder to remove broken pot rivets and any old sill rivets still attached.
I then treated any rust with rust killer and filled in any holes with body filler and left it to harden over night.
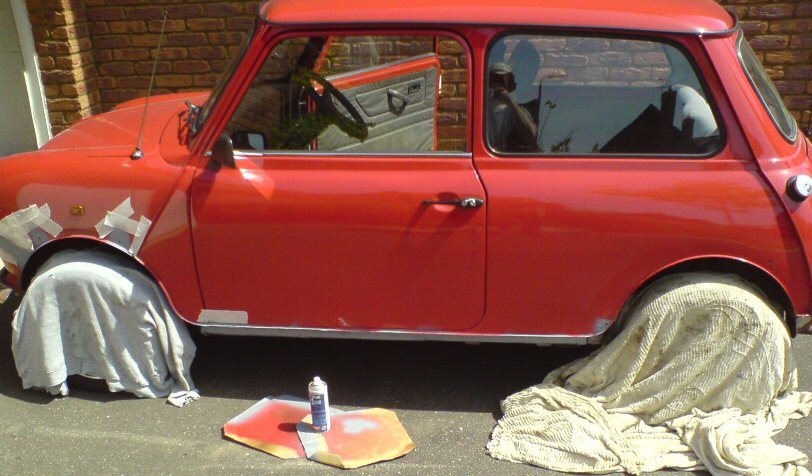
The next day I masked off the body and sprayed the first coat of primer using two pieces of square cardboard to enclose the areas I was spraying in order to prevent paint going astray and to save having to mask the rest of the car with newspaper and masking tape.
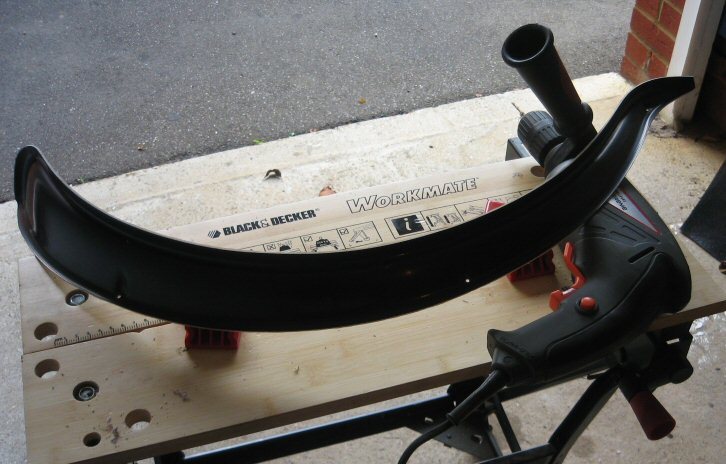
I placed each wheel arch against the body where it was going to go and using a small screwdriver I marked with scratches where I should drill the screw holes. I then lined up the holes in the wheel arches with those in the body to determine how much I needed to cut out of the arch to allow it to fit snugly over the body seams.
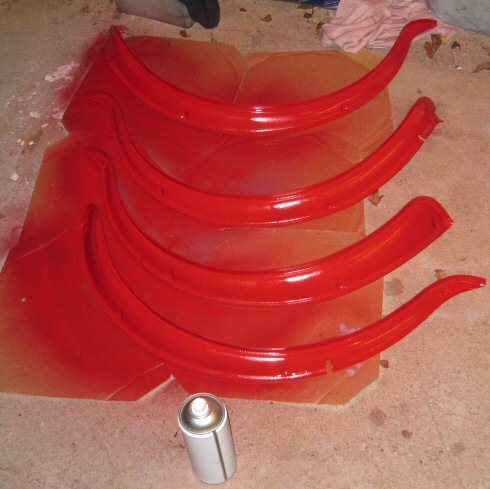
Once I was happy with the wheel arch holes and cuts I sprayed the arches with a coat of primer.
For the rest of the day I sprayed three more coats of primer on the body and over any smoothed down body filler, and over the four wheel arches, repeating each coat every hour. I left everything to dry and harden over night.
The next day I checked for any paint runs which I smoothed out before spraying the first top coat. I repeated the same process of painting a further three layers at a pace of one an hour after which I left the paint to harden over night.
Now most people will probably use self tapping screws to put the wheel arches on but I don't like them because someone could just unscrew your arches and walk off with them. Instead I like to use pot rivets The problem was that the ones I had would not work with these arches.
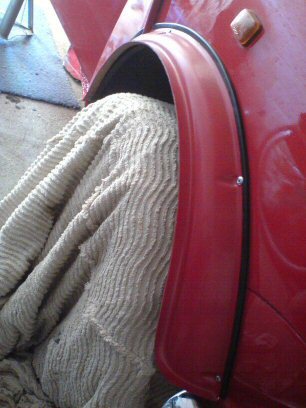
Group 2 wheel arches have these black rubber gaskets which go on the inside lip of the arch to protect the bodywork from any scratches that may be caused by any movement of the arches and to also act as a sealant gasket to prevent water passing between the arch and bodywork. These gaskets move the wheel arch 2mm out from the bodywork. Also, the arch flares out and the bottom lip sits besides the curved bottom of the wings making the gap slightly larger. This means that I'd need longer headed pot rivets
Incidentally, I'd like to point out that you do not need to cut off the bottom lips of the wings to fit Group 2 wheel arches. In fact it is extremely advisable that you do not cut them off. Imagine what would happen if your suspension failed and the wheel and tyres bounced upwards. The sharp metal would instantly slice through your tyres shredding them!
I purchased a selection of longer headed pot rivets from a local hardware store and got started fitting the arches once I was happy with the paintwork.
I tend to start pot revetting the top two middle of the four holes and once they are in I can bend the lower bottom ends into position to ensure that I can line up the holes and get the arch over the body seam. If I haven't cut the seam notch enough to allow a snug fitting of the wheel arch against the bodywork then I have a small metal file which I use to shape the notch in the wheel arch to allow a snug fitting.
Another point I'd like to make is that rust damage or drilling can make the holes a little bigger than you need. Screws or pot rivets just can't get enough of a purchase and so they fall back out. To combat this get yourself some small washers that just fit over the fat end of the pot rivet. Insert the pot rivet through the arch and body and using one hand place the washer over the protruding pot rivet behind the wing and then squeeze the pot rivet tool. This causes the pot rivet to deform against the washer pulling it against the inside of the wheel arch and securing the rivet in place.
For the rear wheel arches, the top two middle holes are not reachable from behind so your only option is to get the biggest longest pot rivets that will fit the holes and to drill wider holes into your wheel arches (but not too close to the edges!).

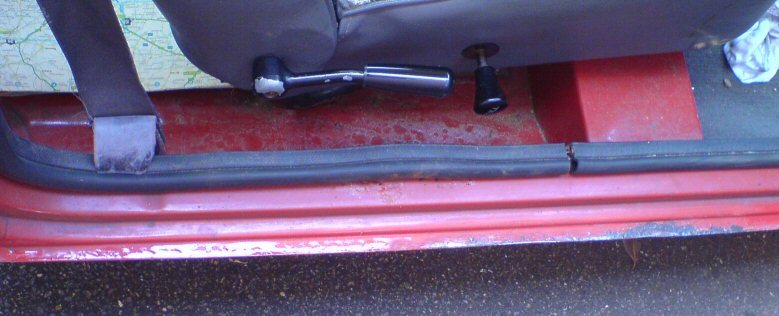
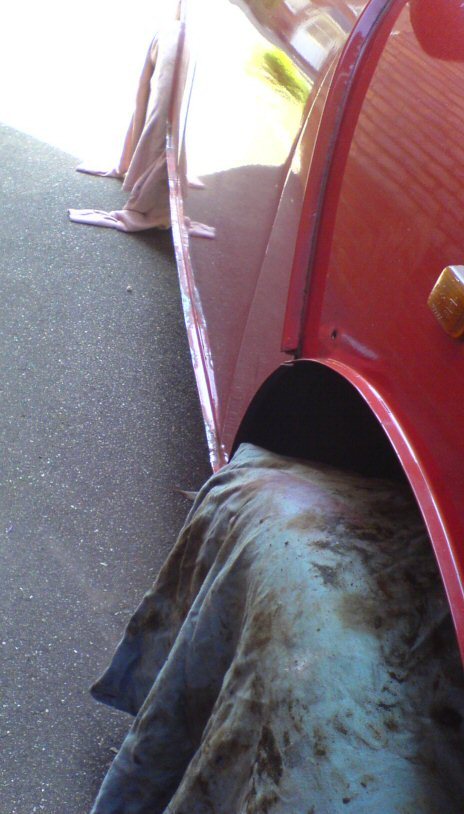
Once all four arches are attached and look good to you, you can start on the trims. I chose black trims because I'm not into chrome all that much (except on wheels) and I think black looks good on a red Mini.
I start at the front by inserting a flat headed screwdriver into the slit of the trim and twist it a bit to create a gap which I can then slot the outer lip of the wheel arch into. Then using a practised up-down wiggle and push motion I work the trim onto the outer lip of the wheel arch until I get down to the sill. For the sill I use a hammer and gently tap the trim over the sill at a 45 degree angle in the direction I am working. For bits of sill that have separated or are fat I use the screwdriver method to open the gap wider so I can tap the trim over it.
I then repeat the wiggle motion method over the back arch and then cut the trim to fit using wire snippers.
I repeat the process for the other side of the car starting again from the front so if there isn't enough trim to cover the whole side then the missing bit will be hidden at the rear (there turned out to be enough in the end).
Once the trim is on I walk around the car inspecting the trim and using the above methods I make sure that the trim is firmly in place and uniform in shape.
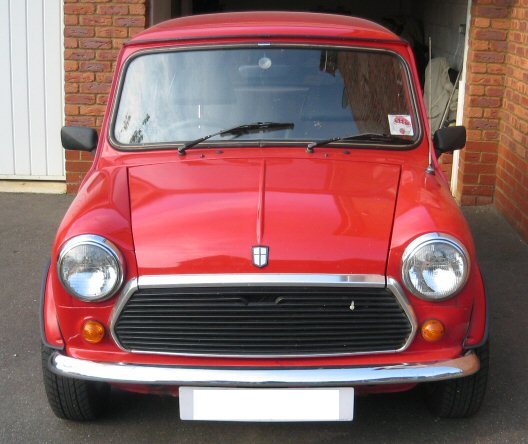
And that's it. My Mini now has wheel arches that cover my 165 tyres and the trim over my sill not only makes the car look better in my opinion, but I no longer catch my ankles or shins on the sharp lip of the metal sills.
Did you enjoy this article or find the information useful? Help keep Dave and his articles online by keeping him fed with coffee by clicking the link below. Cheers!

Next page - Touring Scotland in a Mini
Previous page - Mini disc brake caliper cleanup
Back to the Mini Project Main Menu

This website uses cookies. Click here to learn more about how and why we use cookies.