
On the road again
Click on the images to enlarge
The Mini had been sat in the garage awaiting my return and as the summer was coming to an end I figured that I'd better make a start at getting her back on the road. I put the battery on charge and then went through the motions of checking this and that and cleaning bits and bobs while the charger slowly ticked away.
Cutting a long (and boring) story short the Mini refused to fire and I was stumped as to why. By this point I had changed the distributor cap, HT leads, coil and fitted new spark plugs but it still wouldn't fire. My dad had also come to visit and had taken a look. He fitted new points and condenser but still she wouldn't fire.
Much later, with my dad and my father-in-law scratching their heads staring at the Mini, my dad finally figured out the problem: me.
The original problem was probably caused by worn points and condenser so fitting replacements should have been it, job done problem solved. However, as I'd also removed the distributor cap and leads and fitted replacements, having consulted the Haynes manual for the firing order and direction of rotation, it seems I had not considered the possibility that you can start fitting the HT leads to the distributor cap from the wrong starting point.
To explain it a little better: The rotor arm in the distributor rotates anti-clockwise sending a spark to each connection (12, 9, 6 and 3 o'clock) and I'd connected cylinder 1 to 12 o'clock when the rotor arm was in the right position for cylinder 1 at 9 o'clock.
So lesson learned. When replacing the distributor cap make sure you remember where the leads you are replacing went on the original cap and not just the firing order!
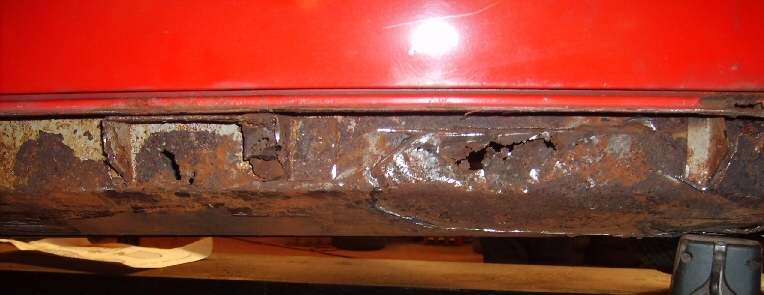
With the Mini running, the next job is to get it through an MOT. I had a look over the car and the only potential problem I could find was a rotting off-side outer sill. A friend and fellow Mini enthusiast popped around and took a look and recommended I take the car to the The East Anglian Mini Centre to get a new sill put on and to put it through an MOT.
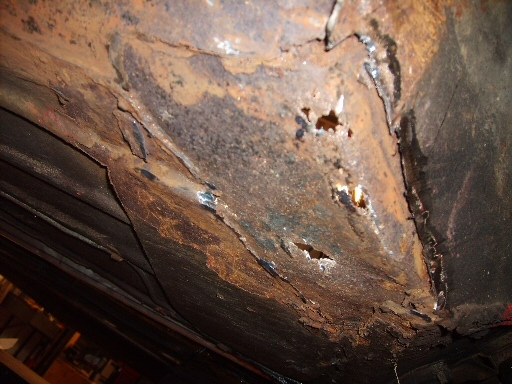
They came and collected the car and put it through an MOT first to find all the problems. There were three failures. The outer sill and part of the floor, engine emissions, and balljoints. I authorised the work and they emailed me photos of just how bad the bodywork was after they had started cutting away. The job kept getting bigger and bigger!
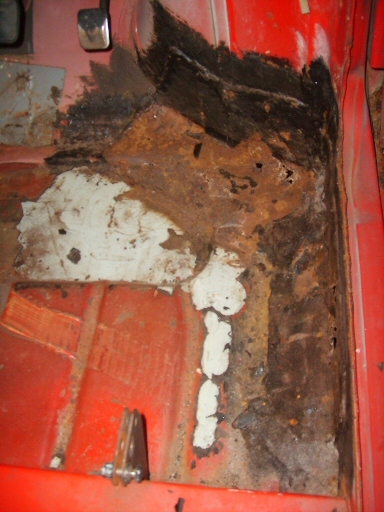
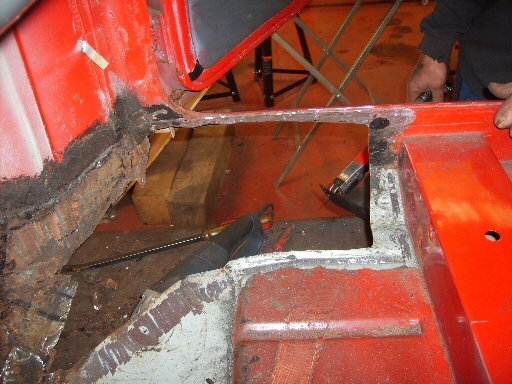
Photos from the garage:
At one point the quote to do all of the work was actually more than I had paid for the car and I had to make a decision whether I kept the car or put it back in storage as I now have a family and the Mini has become my car for commuting to work as we don't use it as a family car.
The East Anglian Mini Centre were very understanding and wanted to help keep the Mini on the road so we negotiated what work needed doing to pass the MOT and to make the car safe, and what I could do myself, later. They sorted the emissions with some carb and timing adjustments (I figured this was down to me fitting the stage one kit) and they replaced the ball joints. The welding was down to labour costs mainly so they patched up the inner sill, put in part of a new floor and a new outer sill (I'd said no to a cover sill as I wanted a proper sill).
It was a fairly sizable bill but I'm happy with the work done and they brought the Mini back after it had gone back through and passed it's MOT. They seem to know their stuff so I'll be using them in future for any work I can't do myself, such as welding.
While the Mini was being repaired I had sorted the insurance and road tax ready for next month. I carried out a few jobs on the Mini in preparation for her return to the road such as applying underseal to the new floor and sill.
The Mini is now back on the road and it feels great to be driving in my Mini again. Plus I've already identified a few things that need attention before winter sets in, so expect some more updates from me soon!
Did you enjoy this article or find the information useful? Help keep Dave and his articles online by keeping him fed with coffee by clicking the link below. Cheers!

Next page - Cooling system maintenance and repair
Previous page - Off the road again
Back to the Mini Project Main Menu

This website uses cookies. Click here to learn more about how and why we use cookies.