
Fitting a Stage 1 kit - Part two - Fitting the RC40 based kit
Click on the images to enlarge

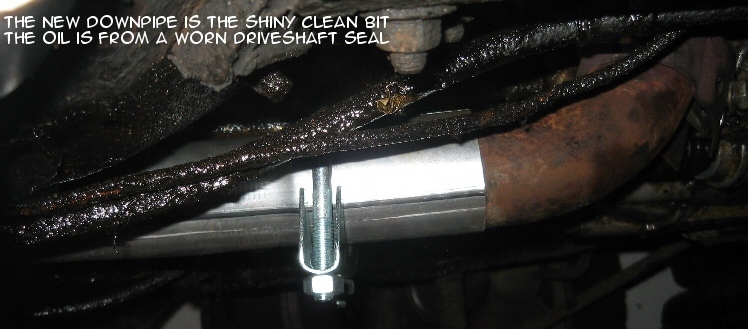
With the stock exhaust system removed I checked the back of the engine and under the car for any signs of wear or other problems. I discovered that the back of the engine was soaked in oil, as was the underneath of the car. Further investigation revealed that the driveshaft seals may be leaking again.

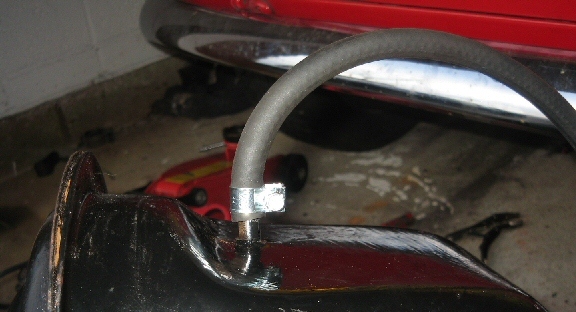
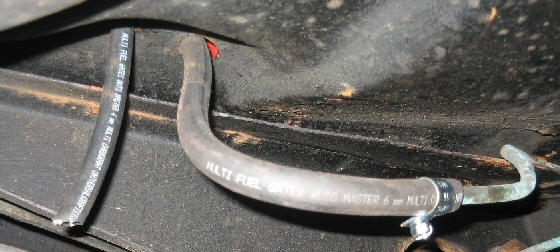
I also discovered that the flexible hose from the petrol tank had a split in it. I couldn't just leave it like that so I drained the tank of fuel, disconnected the pipe and removed the tank. I also found a few nicks in the breather pipe so I removed both and replaced them with new pipe and jubilee clips.
Having to remove the tank added even more time to the time taken to fit the stage one kit, but when you own a Mini you come to expect that as you carry out one job, you'll end up doing a few more along the way.
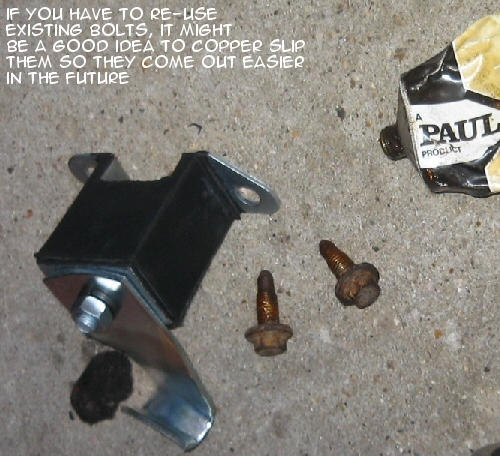
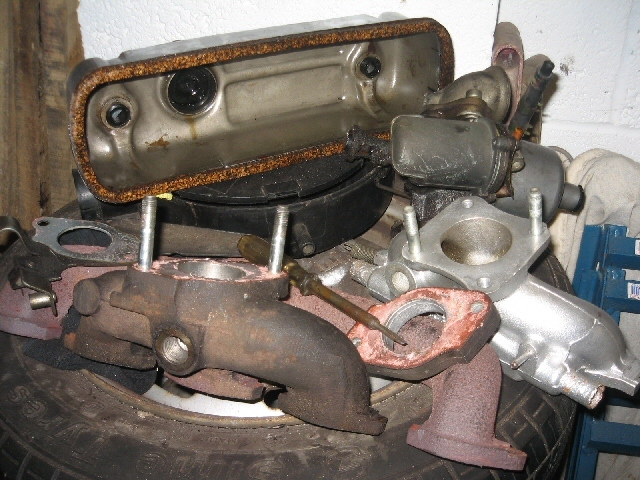
I purchased the RC40 and mounting kit from Mini Spares and it didn't come with any instructions, so a big thanks to the Mini Forum where I made use of the search function to learn where all the bits went. I've added my notes to the photo of the mounting kit on this page.
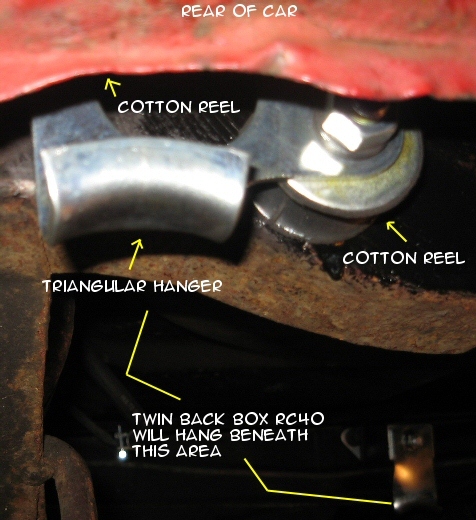
I already had the rear of the car jacked up from the work I did replacing the rear petrol tank pipes, so I got started removing the old exhaust hangers from the rear subframe. The rubber block with the rectangular hanger attaches to the rear subframe beneath the back seats. The mounting kit doesn't come with bolts so I had to re-use the old ones. Luckily they came out ok so I just applied some copper slip to ensure that they come out just as easily in the future.
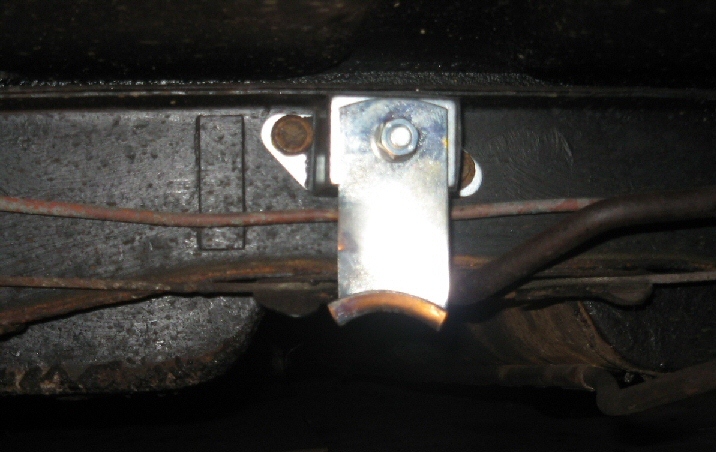
At the very rear of the rear subframe on the rear left of the frame is two holes, one above the other, where the two cotton reels attach to on the outside. The triangular hanger bracket then slides onto the ends of the cotton reels. This is where the tailpipe will protrude from the rear of the car.
With the rear hangers in place I switched to the front of the car.
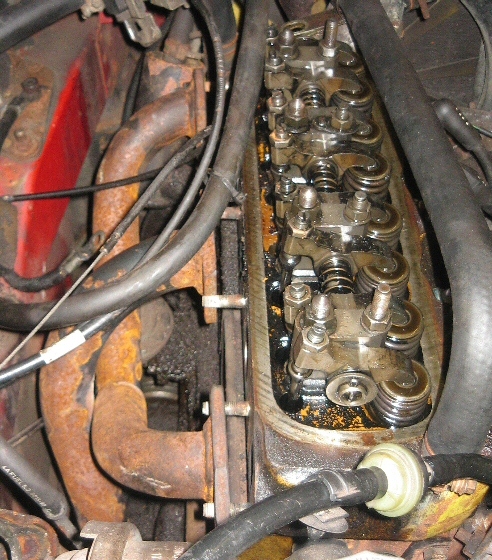
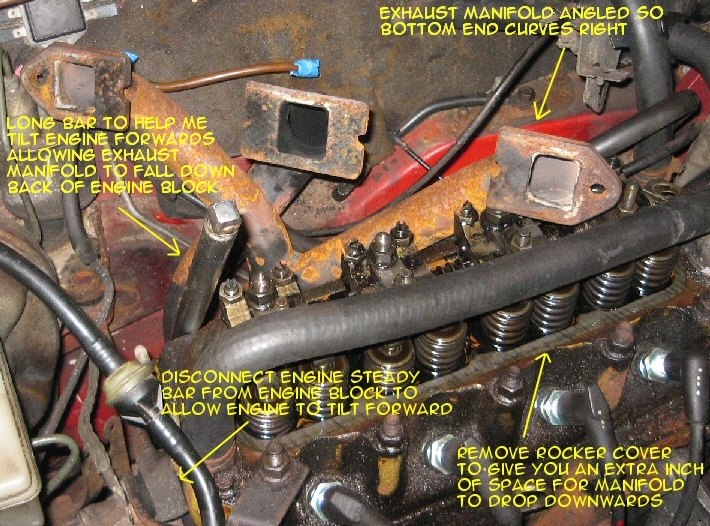
The exhaust manifold is a pain in the butt to get down the back of the engine. You have to disconnect the engine steady arm on the left, as you look at the engine, so that you can rock the engine forward to gain a little more room. You also have to remove the rocker cover so that you have an extra inch of room for your manifold to drop. Just make sure it doesn't get caught in your rockers!
I used a long bar from a socket set to rock the engine forward, positioning the manifold so it will drop a bit, rock the engine forward, re-position manifold, and repeat. Eventually you should be able to twist the manifold into place. Next, slide it onto the four bolts at the back of the engine to make sure that it is at the right height.
A good tip when removing the stock system is to make a note which way around the exhaust and inlet manifold gasket came off so you know which way around to put the new one on. After the gasket is on slide the exhaust manifold onto the engine over the four bolts.

Fitting the inlet manifold was a bit of a pain for me. I'd been given two spare performance inlet manifolds and the one I started to use had this extra small pipe on it but I had nothing to attach it to so I had to switch to using the other one I had, stamped Mini Sport. The problem was that this one had bits of old gasket attached and no bolts. So using a small flat screwdriver I slowly removed the bits of old gasket and smoothed it off with a bit of wet and dry. I then put two nuts on each of the bolts on the other inlet manifold and tightened them against each other so that I could unscrew the bolts and screw them into the inlet manifold I intended to use.

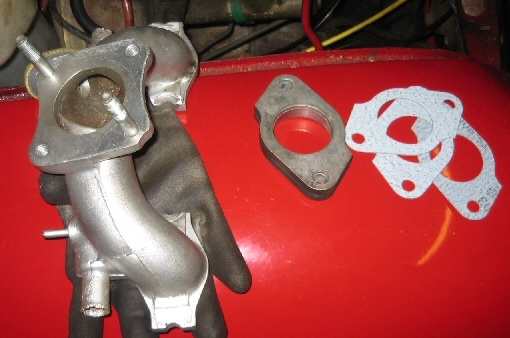
With the two bolts on in the right holes, fit the first gasket, then slide on the big spacer-like block, then the next gasket, then the metal plate that the throttle cable and return spring attaches to, then the final gasket.

Attach the inlet manifold to the back of the engine and fit the washers and bolts and tighten. Then fit the big thick black pipe that goes to your brake servo to the top of the inlet manifold.
Fitting the needle to the carburetter is actually very easy. I wanted to clean my carb at the same time so I put everything in an old baking tray making sure I'd emptied the oil in the dashpot first. Undo the three bolts holding the top bottle-like cover on the SU carb and lift off. Remove the piston and locate the side screw holding the needle, seat and spring, unscrew and withdraw.
I cleaned the carb with a clean rag and then replaced the needle and put the carb back together and that was it. I then attached the carb to the back of the inlet manifold and reconnected all the pipes using the digital photos I'd taken before removal to help me ensure everything was correct.
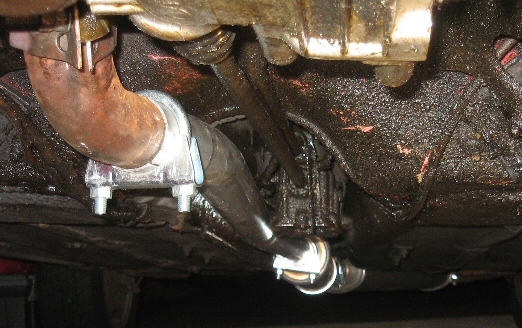
Next I jacked the front of the car up and re-used the old downpipe bracket to secure the bottom of the exhaust manifold against the bracket on the back of the gearbox. The old exhaust pipe had a smaller diameter than that of the new one so I had to hammer the bracket into shape to fit it around the new exhaust pipe. I re-used a bracket bolt as well. In case you are wondering why I went to these lengths, it was because I sourced the Maniflow exhaust manifold from a mate and it came without a bracket.
The downpipe (the long bendy pipe) goes over the bottom of the exhaust manifold. When you slide it on it becomes immediately obvious which way around it goes, because when you twist it, it will naturally curve around the housing at the base of the gearstick located in the trough running under the center of the car.
A note of caution: Do not hammer the downpipe onto the exhaust manifold! I did this, using a piece of cloth to protect the end being (lightly) hammered. If you do this, the pipe will slide over the exhaust manifold about two inches. You will then find that it won't reach the back section! The downpipe in my opinion needs another inch in length at least. I had to use a flat-headed screwdriver to slowly tap the downpipe off of the exhaust manifold working around the rim of the new pipe slowly tapping it backwards until it freed-up an inch which I could then use to attach the back section.

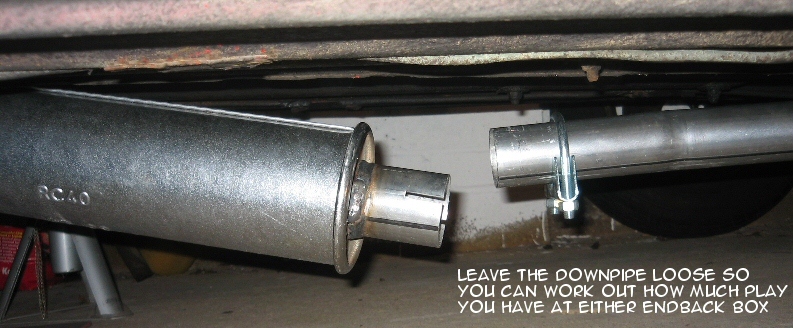
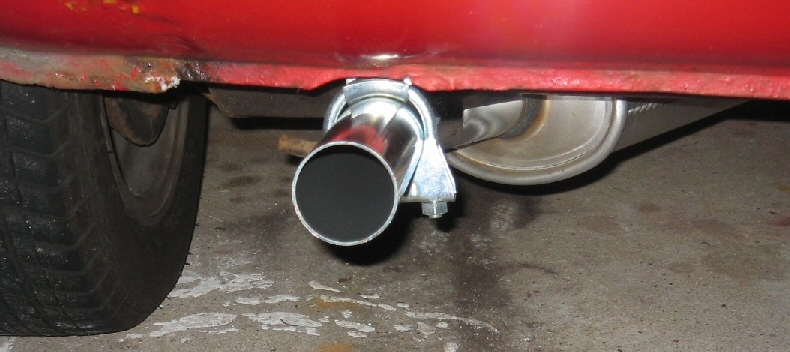
To attach the rear twin-box section I attached the rear-most hanger with the nuts just on the threads, and then I fed the tailpipe through the clamp and slid it onto the downpipe. I then hooked the rear of the back box to the hanger located under the rear seats. Then I placed the two larger U-bolts onto both ends of the downpipe and tightened them up a little.
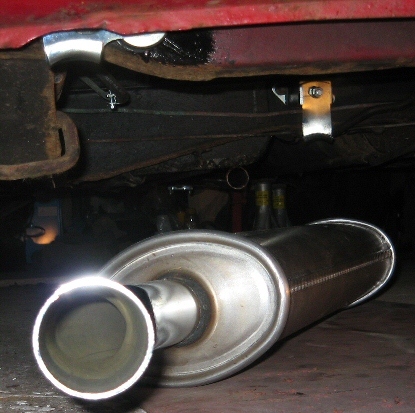
Working under the back and side of the car I positioned the RC40 exhaust just how I wanted it. I then re-fitted the engine steady bar in the engine bay back to the engine block. Then I tightened all the hangers on the exhaust. When tightening the two large U-bolts to the ends of the downpipe, you will notice that at the ends of the downpipe there are several notches, and as the U-bolts/clamps are tightened these notches come together. Don't over-tighten the bolts.
With the RC40 exhaust system on, the next step is to replace the rocker cover and make sure that everything is back in place in the engine bay.

Replace the stock paper air filter with the K&N and remove the thingy that goes onto the stock air filter box intake hole. I'm refering to the thing that sits on top of the metal cowling that used to attach to the drivers side of the stock exhaust manifold. I say used to because the cowling won't fit over the new exhaust manifold so it cannot be put back on.
Note: Getting a stock air filter box back on over the carb will require you to put the rear cylindrincal butterfly bolt into the air filter box hole first, before you slide the unit over the carb. The carb is now sitting higher in the engine bay so you cannot get the bolt into the hole with the air filter box already in place because it sits higher, nearer to the underside of the skuttle panel.
With everything back on I reconnected the battery and started the car, I'm happy to say that it started first time and sounded ok, if running a little fast. Adjust tickover to suit.
 I took the car out onto the roads to the local petrol station to get some fuel. I didn't notice much difference in
the cars performance at first. I was expecting it to be very noisy but it was not, and at idle there was a nice humming sound, kind of like a normal modern car would sound at idle. It wasn't until I got out onto the major roads that I noticed the difference. My 998cc Mini City E is pretty nifty going from 0 to 40mph in 3rd gear, if a little high-pitched sounding due to the high revs. However, I was at 50mph before I realised that it could go faster in 3rd and it still wasn't sounding loud! Dropping it into 4th I was happy to find that I still had more power, rather than the flat slow slog up the speedo from 40 to 70mph that I'm used to.
Did you enjoy this article or find the information useful? Help keep Dave and his articles online by keeping him fed with coffee by clicking the link below. Cheers!

Next page - Off the road again
Previous page - Fitting a Stage 1 kit - Part one
Back to the Mini Project Main Menu

This website uses cookies. Click here to learn more about how and why we use cookies.