
Replacing the front wheel bearings
Click on the images to enlarge
I started to notice a noise coming from the front of the car when I was driving, especially on motorways. So one evening I drove down a quiet road on my estate where there were no cars and put the car in neutral, the noise was still there as the car rolled down the road. I turned the ignition off (still rolling) and the noise was still present. It sounded like a bunch of stones in a coffee grinder. I suspected that one of my wheel bearings had gone.
Back home, I jacked the front of the car up, and with it out of gear I spun each of the road wheels. The noise was coming from my front left wheel. The noise only happened at a certain point on each revolution.
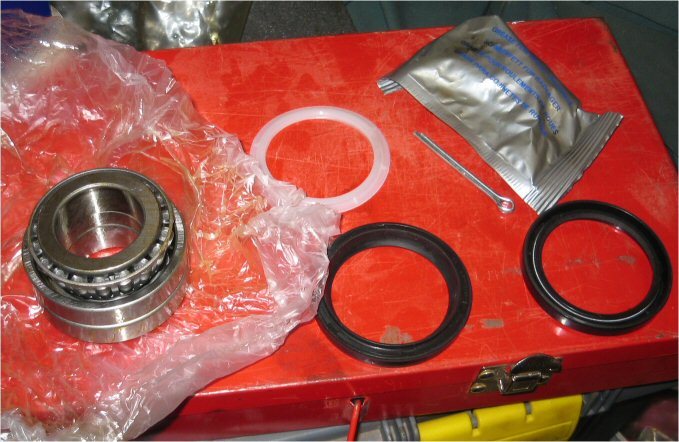
The next day I nipped over to the local motor factors and bought a new set of wheel bearings, a ball joint splitter, and a socket big enough to remove the castellation nut that holds the wheel hub on (1.5/8").
Replacing a front wheel bearing is no easy job. For one, all the nuts and bolts on the front were pretty much seized up and would only come off by using a hexagonal AF socket set. Don't even bother trying to use sockets with more than 6 sides unless you like dealing with rounded-off nuts. If you are going to work on a Mini, buy yourself a decent set off 6-sided AF (imperial/non-metric) sockets.
The following is the procedure I used to replace the front wheel bearing:
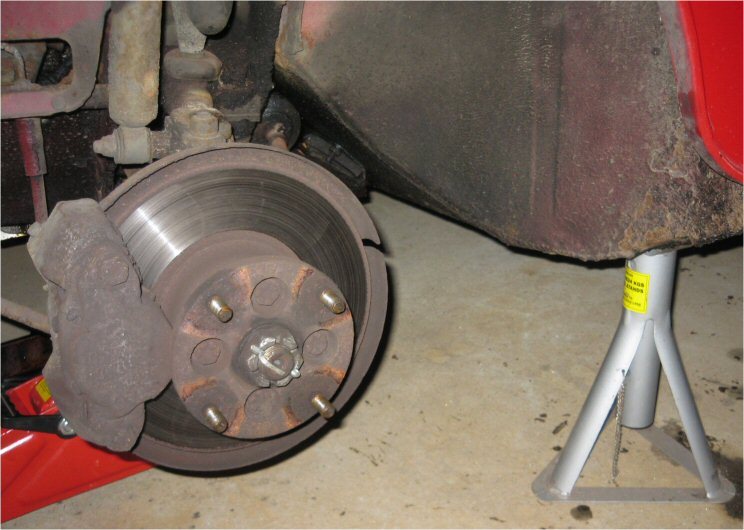
Loosen the road wheel nuts and jack the car up and secure with an axel stand. Remove the road wheel.
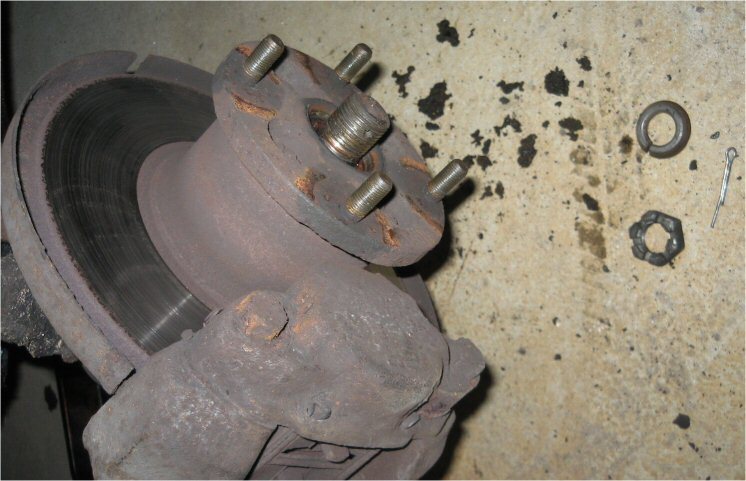
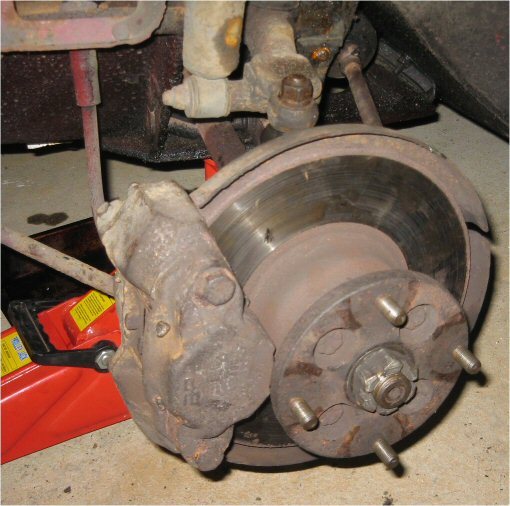
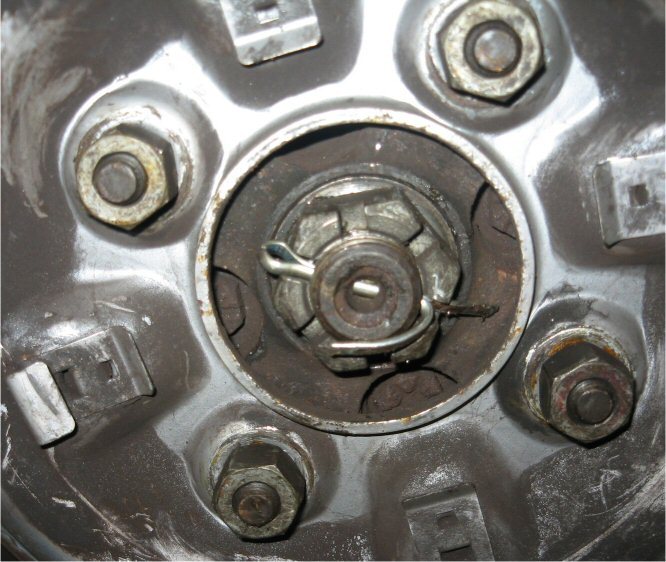
Remove the splitpin from the castellation nut (the big nut that holds the wheel hub on and looks like the top of a castle turret). Using a big socket bar to get a lot of leverage, fit your socket and if you can, get someone to depress the brake pedal. Undo the nut and remove along with the tapered washer behind it.
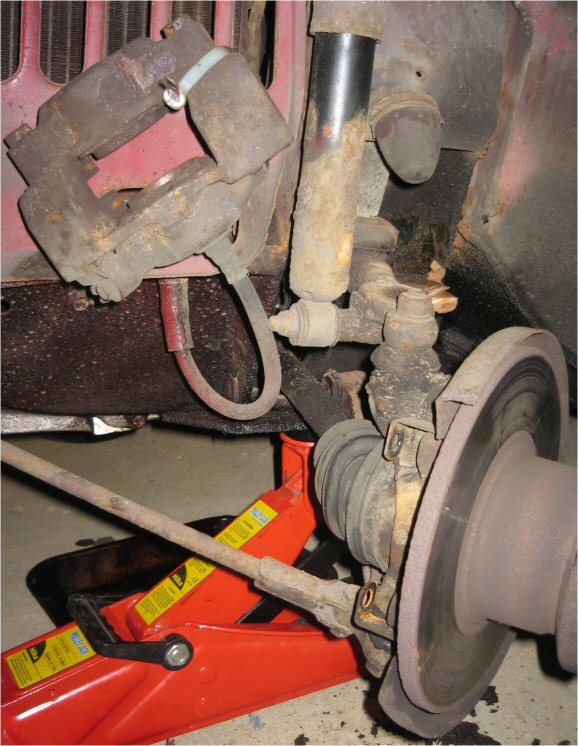
Remove the brake caliper with pads by undoing the two bolts at the back of the caliper. Turn the steering wheel so that you can get easy access. I had to spay the bolts with WD40 and leave overnight as they were both seized.
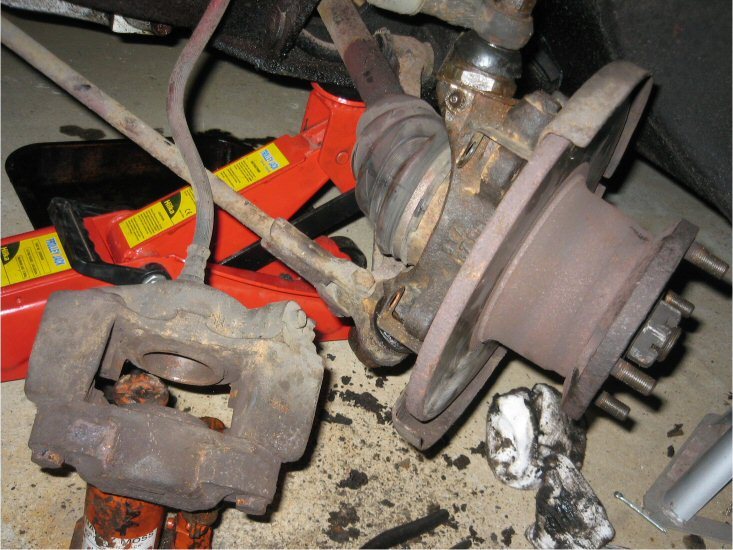
Remove the caliper from the hub and secure to the body with string or a cable tie. Don't just let it hang!
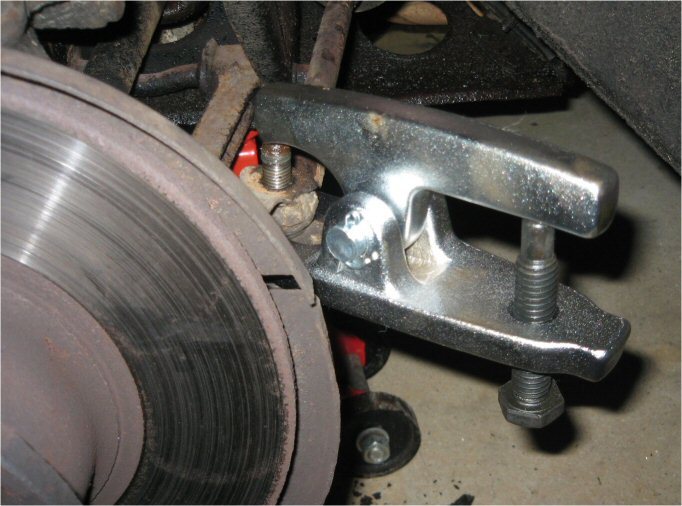
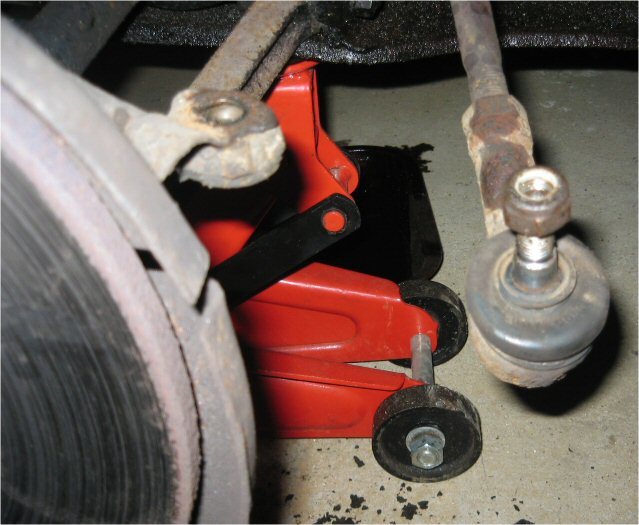
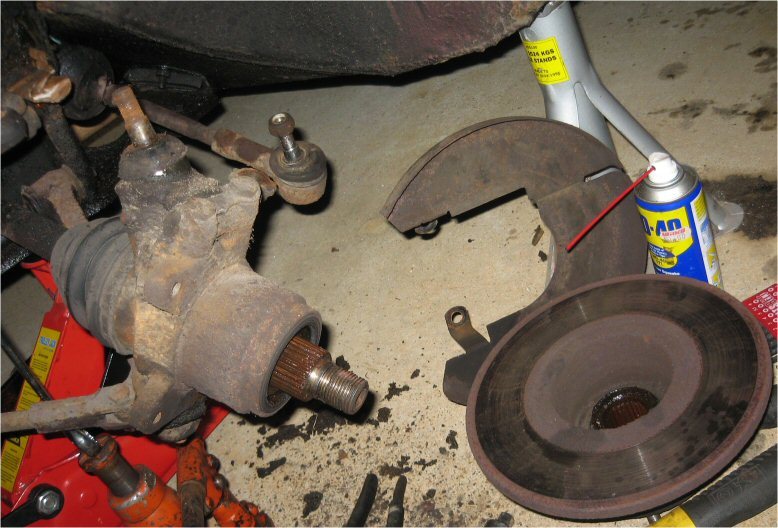
Undo the steering arm ball joint with a socket set to first remove the nut, then a ball joint splitter to separate it from the hub. Remove the brake disc shield and the brake disc.
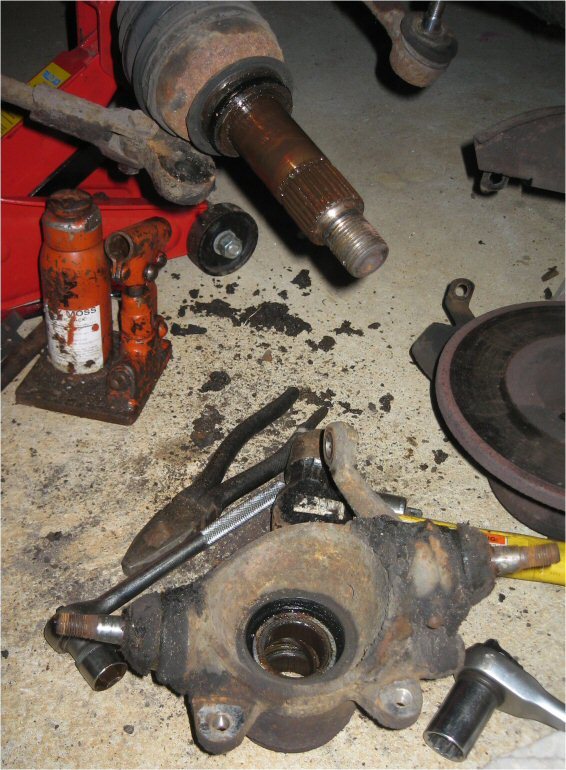
Remove the nuts and washers from the top and bottom ball joints, and use the ball joint splitter to separate the ball joints from the hub. Lift the hub off.
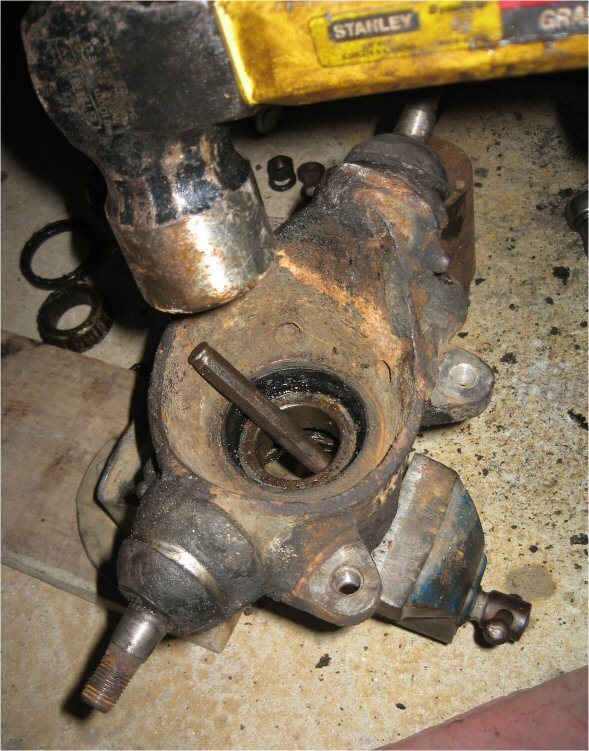
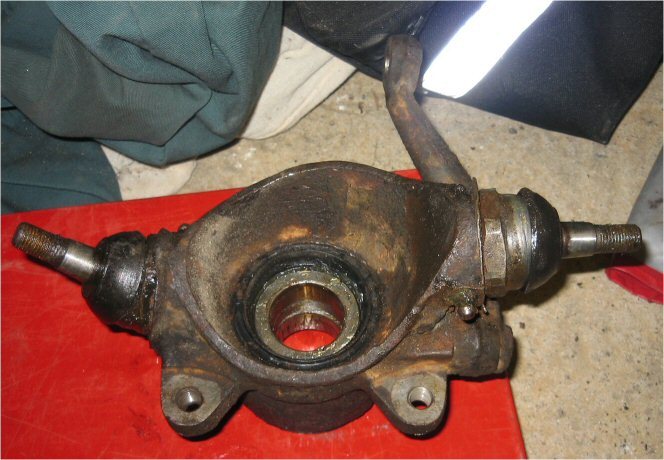
Use a big dull-ended flat-headed screwdriver to remove the rubber/plastic washers from the hub. Then use metal drifts to tap out the wheel bearings from both sides of the hub. Keep the oil seal spacer (looks like a metal ring that is not a complete circle) because I never got a replacement in the new kit.
Inspect the hub for wear. If the outer tapered part of the wheel bearings were a pain to get out then the hub is probably fine. Look for any gouges in the hub's inner wall. Any imperfections or damage that will allow the new bearings outer casing to move around is not good. They need to be a tight fit.
I used this You Tube video to see how to fit the new bearings.
Clean out the inside walls of the wheel hub with a rag and starting with one side, use a metal drift and slowly tap in the new bearings outer sleeve. Imagine that the metal ring is a clock. Tap 12, 6, 3, 9 o'clock. Then 2, 8, 10, 4, and repeat until the ring is tight in the middle against the lip of the middle of the hub. Then do the same from the opposite side.
Insert the greased bearings (use all of the grease that was provided) and the spacer, and employ the same clock technique of tapping the black oil seals in place.
Grease the plastic washer and place it over the drive shaft.
Slot the hub back over the drive shaft and tighten up the top and bottom ball joints to the specified torque. Also connect the steering arm ball joint to the correct torque.
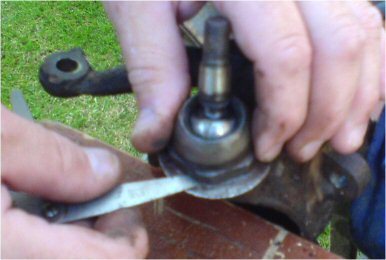
Note: The top ball joint was very loose when trying to refit it, so the hub was taken back off and the ball joint was removed by sticking the hub in a vice, tapping the side washer flat, and using a big spanner to remove the domed nut. Then the smallest of the three shims (paper thin large metal washers) was removed and the domed nut was tightened back up to the specified torque. Using my grease gun on the grease nipple, I filled the ball joint with fresh grease. I'd already cleaned the old grease from out of the ball joint and the rubber cap, after inspecting it for cracks.
Put the disk back on over the hub. Tap it back in place gently with a hammer. Insert the tapered hub washer and castellation nut and tighten as much as you can.
Put the disc shield back on and the brake calipers. I had removed my brake pads making it easier. I used Loctite on the caliper bolts before refitting. Replace the disc pads, retention cover, and splitpins.
Check everything is back on and in place and tightened to the correct torque, then refit the road wheel and nuts.

Remove the axel stand and lower the car back down. Put the car in gear, or get someone to stand on the brake pedal. Fit the large socket to a torque wrench and tighten the castellation nut to the correct torque setting before replacing the split pin.
Note: I found that although I owned the torque wrench that Mini Magazine recommended, it only went up to 210Nm, but the Haynes manual said to tighten to 255 - 270Nm (for drive shafts with a single splitpin hole). So I set the torque wrench to 100Nm and tightened the nut. I then removed the wrench and marked one edge of the nut against the hub with a piece of metal. I then set the wrench to 150Nm and did the same again noting any movement. I did the same again for 200Nm. Noticing how little distance was between the 3 markings, I got the biggest socket bar I owned and fitted the socket to it, and then attempted to move the nut to where I thought 255 - 270Nm should be. I had to stand on the damn thing! I then had to move it a few mm more so that I could get the splitpin back in.
Lastly, I torque'd up the road wheel nuts to the recommended 60Nm and took the Mini for a drive. All was quiet once again!

Did you enjoy this article or find the information useful? Help keep Dave and his articles online by keeping him fed with coffee by clicking the link below. Cheers!

Next page - Stripping a Mini for spare parts
Previous page - Solving ignition problems
Back to the Mini Project Main Menu

This website uses cookies. Click here to learn more about how and why we use cookies.